Creating a DynamoDB Stack using AWS Cloud Development Kit for Java with Gradle
A practical introduction for beginners

In this tutorial, we will learn how to create a Dynamo DB stack using the AWS CDK Toolkit along with Java and Gradle, and synthesize an AWS CloudFormation template. And we will also see how to deploy your app into your account.
What is AWS Cloud Development Kit ( CDK )?
AWS Cloud Development Kit” or in short, the AWS CDK is an open-source software development framework from AWS with the sole purpose of making it fun and easy to define cloud infrastructure in your favorite programming language and deploy it using AWS CloudFormation.
Provisioning cloud applications can be a challenging process requiring you to perform manual actions, write custom scripts, maintain templates, or learn domain-specific languages. AWS CDK uses the familiarity and expressive power of programming languages for modeling your applications. It provides you with high-level components called constructs that preconfigure cloud resources with proven defaults, so you can build cloud applications without needing to be an expert.
An AWS CDK application can be written in TypeScript, JavaScript, Python, Java, or C# that uses the AWS CDK to define AWS infrastructure. An app defines one or more stacks. Stacks (equivalent to AWS CloudFormation stacks) contain constructs, each of which defines one or more concrete AWS resources, such as Amazon S3 buckets, Lambda functions, Amazon DynamoDB tables, and so on.
To install the CDK, run the following command in the cmd.
npm install -g aws-cdkAWS CDK Important Commands
Synthesize a template from your app
AWS CDK apps are effectively only a definition of your infrastructure using code. When CDK apps are executed, they produce (or “synthesize”, in CDK parlance) an AWS CloudFormation template for each stack defined in your application.
To synthesize a CDK app, use the CDK synth command. In our project, we will be adding this command to the Gradle Build Script file.
cdk synthBootstrapping an environment
Many AWS CDK stacks that you write will include assets: external files that are deployed with the stack, such as AWS Lambda functions Docker images. The AWS CDK uploads these to an Amazon S3 bucket or other containers so they are available to AWS CloudFormation during deployment. Deployment requires that these containers already exist in the account and region you are deploying into. Creating them is called bootstrapping.
The first time you deploy an AWS CDK app into an environment (account/region), you’ll need to install a “bootstrap stack”. This stack includes resources that are needed for the toolkit’s operation. For example, the stack includes an S3 bucket that is used to store templates and assets during the deployment process.
You can use the CDK bootstrap command to install the bootstrap stack into an environment. In our project, we will be adding this command to the Gradle Build Script file.
cdk bootstrapWe can then use CDK deploy to deploy a CDK app:
cdk deploy What is Dynamo DB?
Amazon DynamoDB is a key-value and document database that delivers single-digit millisecond performance at any scale. It’s a fully managed, multi-region, multi-active, durable database with built-in security, backup and restores, and in-memory caching for internet-scale applications. DynamoDB can handle more than 10 trillion requests per day and can support peaks of more than 20 million requests per second.
Prerequisites
In order to complete this tutorial, you should have knowledge of beginner or intermediate Java 8/11 programming skills, familiarity with Gradle, and also you should have a general familiarity with AWS Services.
Tools & Technologies needed:
- AWS CLI
- AWS Account and User
- Node.js
- IDE for your programming language
- AWS CDK Toolkit
- Java 8/11
- Spring Boot
- Gradle
Step 01: Setting up AWS CDK toolkit with Gradle
To start working with this project, first, we have to install Node.js on your computer. The AWS CDK uses Node.js (>= 10.3.0). To install Node.js visit the node.js website. Windows: if you have an old version of Node.js installed on your system, it may be required to run the .msi installation as Administrator. If you already have Node.js installed, verify that you have a compatible version:
Setting up project
Create a Spring boot Gradle project and import it to your preferred IDE. In this tutorial, we will be creating our application in a sub-module named Deploy services. You can remove the src file of the main project. Create another module named deploy-services and import it to your main project settings.gradle file and refresh.
Deploy-services module
The Deploy Services module will contain the app’s main entry point. First, we will create two Java files CdkDeployApp.java and CdkDeployStack.java in the main project directory for Java code in the app. Then we will create a cdk.json and cdk.context.json file in the root.
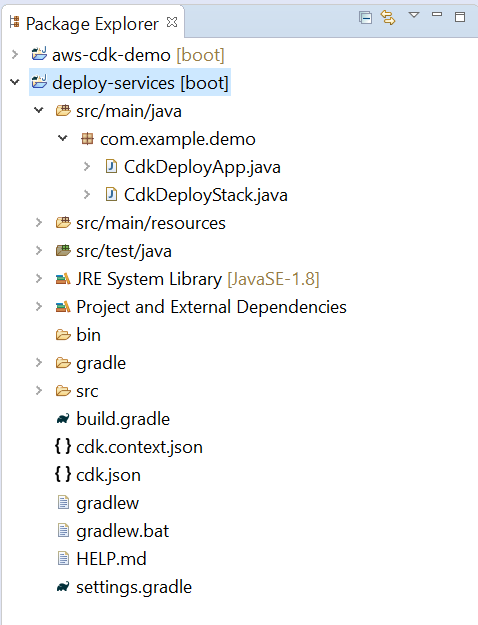
~/CdkWorkshopApp.javais the entry point for the CDK application it will load the stack defined in~/CdkWorkshopStack.java~/CdkWorkshopStack.javais where your CDK application’s main stack is defined. This is the file we’ll be spending most of our time in.cdk.jsontells the toolkit how to run your app.cdk.context.jsonis where the AWS CDK caches context values retrieved from your AWS account.
Then we are going to migrate our build logic from Groovy to Kotlin to write few node commands which will be explained later in the tutorial.
Groovy DSL script files use the .gradle file name extension and Kotlin DSL script files use the .gradle.kts file name extension. To activate the Kotlin DSL, simply rename your Gradle Build Script file ( build.gradle ) to .gradle.kts extension.
Setting up build.gradle.kts
Before the start of the implementations, let’s set up our build.gradle.kts file. First, clear out the existing source codes in the build script file. Import NodeExtension & NpxTask and configure the node version .
As for the main step we need to define our main class as our entry point to the application. Therefore, we have to add our main class inside the application blocks.
A variable named env should be declared, which will be used later on to append a name when deploying our application ( Ex: prod/dev/stg).
Then, we will configure our CDK commands in the Gradle file as;
task<NpxTask>(“synth”) {
description = “Generate CDK artifacts”
command = “cdk”
args = listOf(“synth”, “-c”, “env=$env”)}task<NpxTask>(“deploy”) {
description = “Deploy CDK components”
command = “cdk”
args = listOf(“deploy”, “*”, “-c”, “env=$env”)
doFirst {
   “Deploying env:$env” }
}task<NpxTask>(“destroy”) {
description = “Destroy CDK components”
command = “cdk”
args = listOf(“destroy”, “$env”, “-c”, “env=$env”, “ — force”) doFirst {
   “Destroying platform for env:$env” }
}
The important dependencies should be then added to the script file which is the AWS CDK core & dynamo DB. The completed build script file can be found below.
Step 02: Building the Application
App’s entry point
Let’s create the ~/CdkWorkshopApp.java
This code loads and instantiates the CdkDeployStack class from the ~/CdkDeployStack.java file. It also contains the AWS account details.
The AWS-ACCOUNT and AWS-REGION field values in the JSON files should be replaced by your respective account details.
The main stack
Let’s create our app’s main stack. This is where the meat of our application is.
The unit of deployment in the AWS CDK is called a stack. All AWS resources defined within the scope of a stack, either directly or indirectly, are provisioned as a single unit.
Because AWS CDK stacks are implemented through AWS CloudFormation stacks, they have the same limitations as AWS CloudFormation.
You can define any number of stacks in your AWS CDK app. Here we have created a DynamoDbStack.
Creating the Util Class
Let’s configure our env variable which we defined in the build script file.
CDK Util class simply appends the env variable value we provide to the app content. Once we deploy our app, we have to provide a value for the env variable.
Creating the Dynamo DB Stack
In addition to using existing constructs like the S3 bucket, we can also write our own constructs. All constructs are equal in the AWS CDK. An AWS CDK construct such as s3.Bucket or sns.Topic behaves the same as a construct imported from a third-party library that someone published via NPM or Maven —or to your company's internal package repository.
To declare a new construct, we have extended the Construct base class. This library includes constructs that represent all the resources available on AWS. For example, the s3.Bucket class represents an Amazon S3 bucket, and the dynamodb.Table class represents an Amazon DynamoDB table. By declaring the construct we have created a table in Dynamo DB.
These constructs are designed to help you complete common tasks in AWS, often involving multiple kinds of resources.
Moving on to PK and SK get methods,
Primary keys define where and how your data will be stored in partitions. The Key schema can be made up of two keys:
- Partition Key (PK) is also known as HASH
- The Sort Key (SK) is also known as RANGE
Key Uniqueness is as follows:
- When creating a Simple Primary Key the PK value may be unique
- When creating a Composite Primary Key the combined PK and SK must be unique
When using a Sort key, records on the partition are logically grouped together in Ascending order.
Configuring cdk.json & cdk.context.json
The AWS-ACCOUNT, AWS-ACCOUNT-REGION, VPC-ID & VPC-SUBNET-ID field values in the JSON files should be replaced by your respective account details.
In the cdk.json file, the “app” value contains the build command. For windows, it should be used as it is but for Linux, it should be changed to,
“app”: “cd ../ && ./gradlew deploy:run”Deploying our application
To deploy our application open the cmd/Git Bash from the project root folder and type
./gradlew clean build deploy -Penv=<env>A value for <env> should be given with the build command and it can be based on the environment. In our case, it is given as ‘dev’, thus it will be appended to all the stack names we are creating.
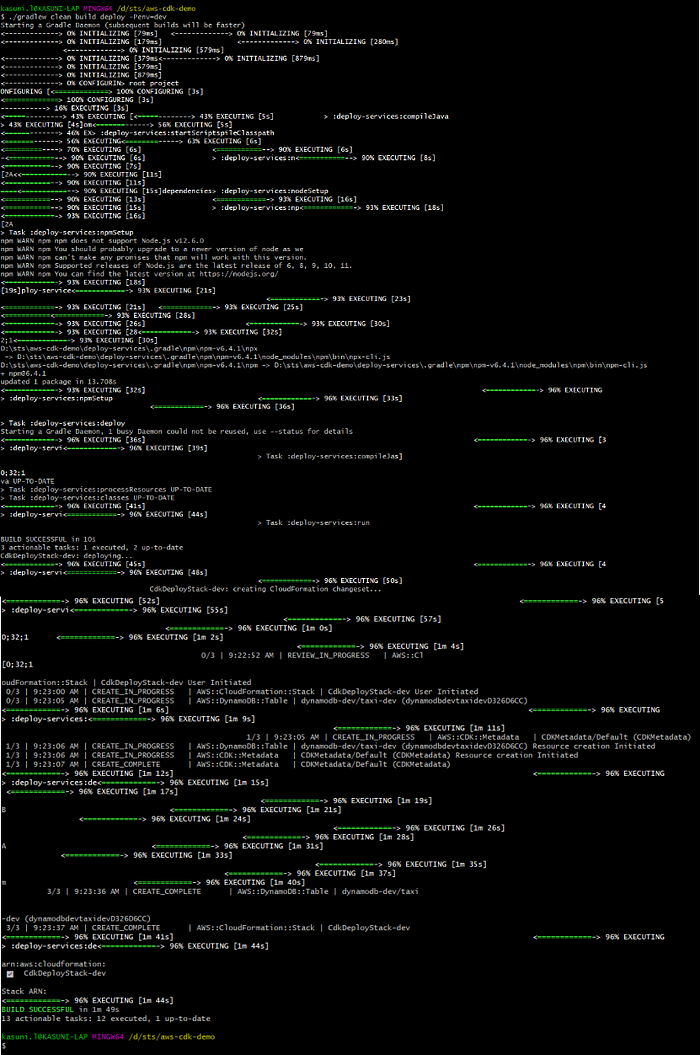
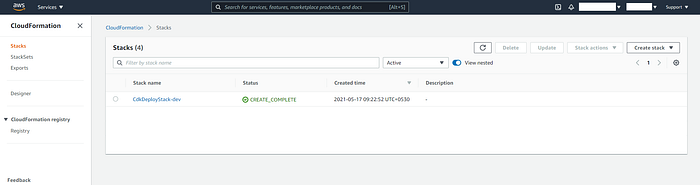
After a successful build, you can view the stacks that have been created in your AWS account.
Login to AWS Console and go to CloudFormation. This is where our stack has been created.
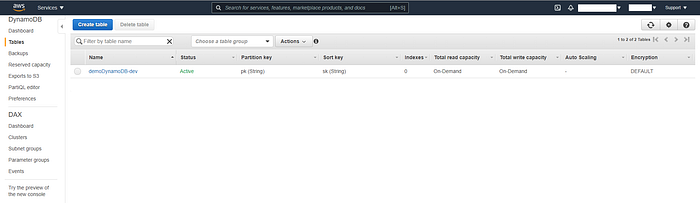
Next, go to DynamoDB. This is where our table has been created with the name we have given and the env variable appended to it.
If you’ve followed this article to the end, you’ll now have experience of all the essential ingredients to use AWS CDK with Java & Gradle, as well have how to successfully create a DynamoDB stack.
I hope you enjoyed this article. Thanks for reading!
See you guys in the next article! ✌🏼
More content at plainenglish.io